Context
Workshop project • Group work • Robotic fabrication + computational design
- Institution: University of Tehran
- Role: Design, software, and fabrication
- Robot platform: KUKA KR6 with KRC2 controller
- Supervisor: Dr. Ramtin Haghnazar (and team)
Overview
This page collects selected digital fabrication projects that connect computational design with physical making, from robotic toolpaths and pick-and-place experiments to CNC-produced, full-scale plywood structures.
Jump to: ROBOTISM • INTEGRITY • CLIMATE‑RESPONSIVE FACADE
Parametric design Plywood structures Robots + CNC Assembly planning
Workshop project • Group work • KUKA KR6 (KRC2/KRL) • Rhino/Grasshopper toolpaths
Summary
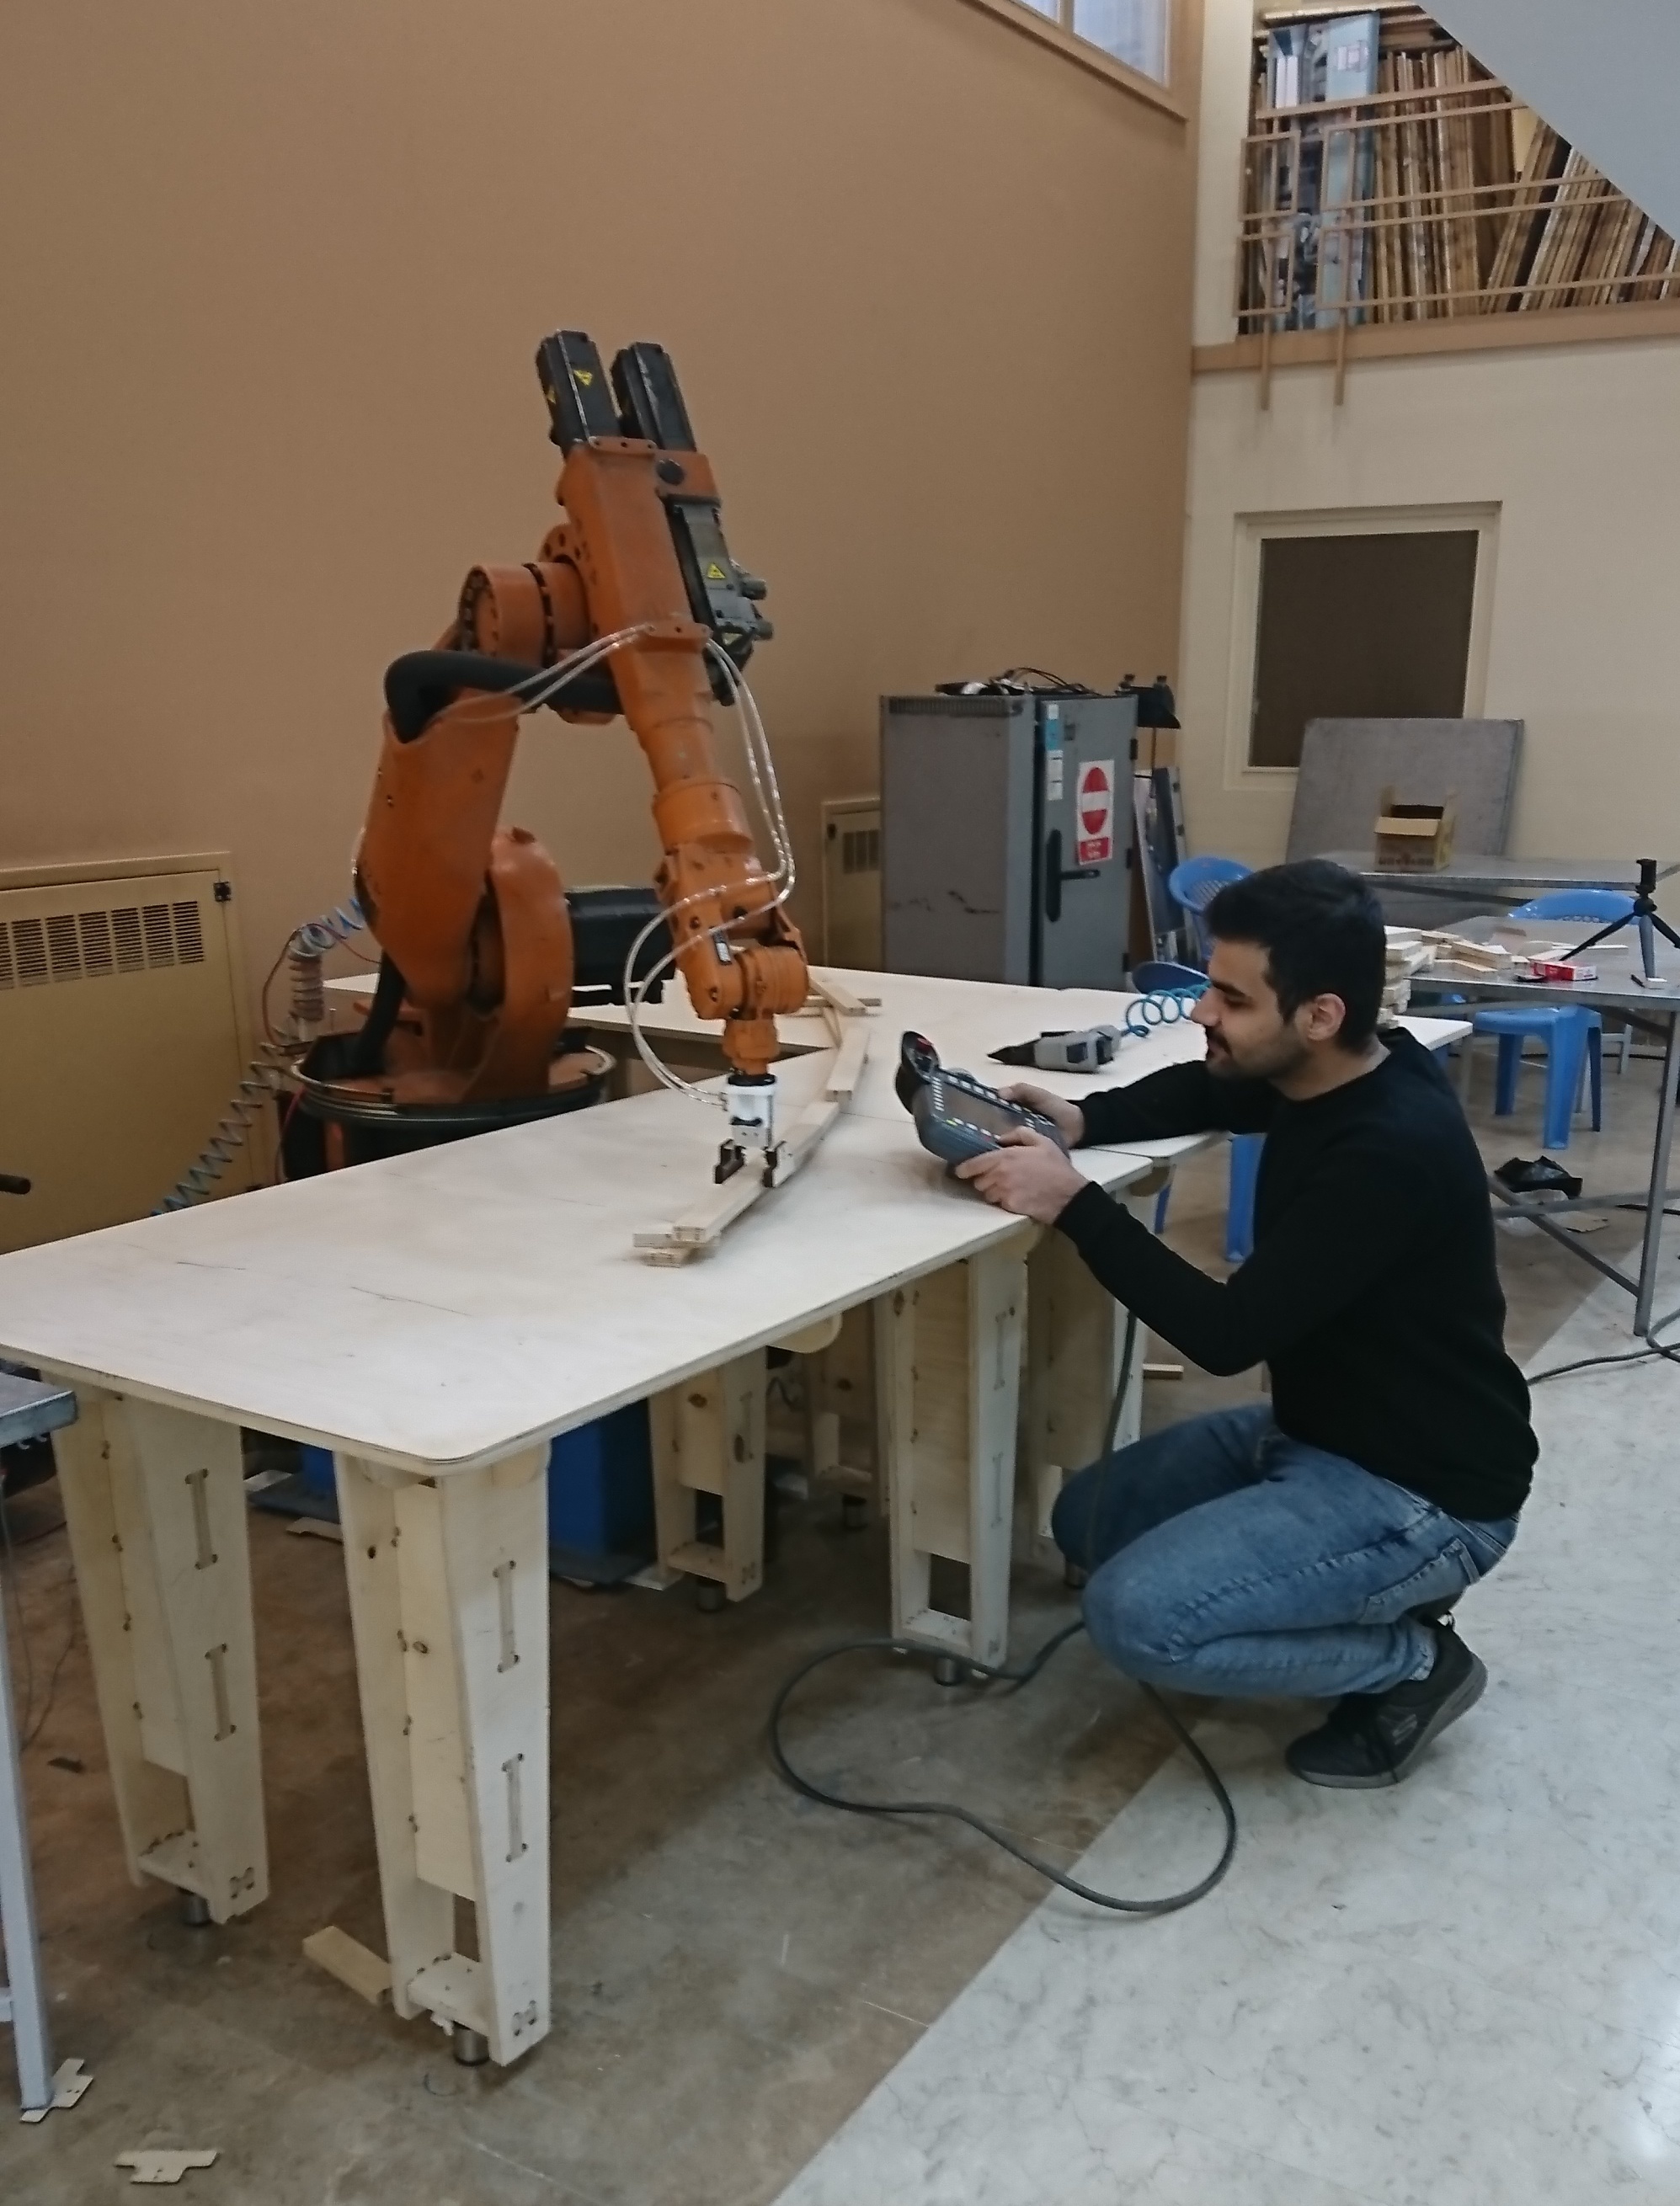
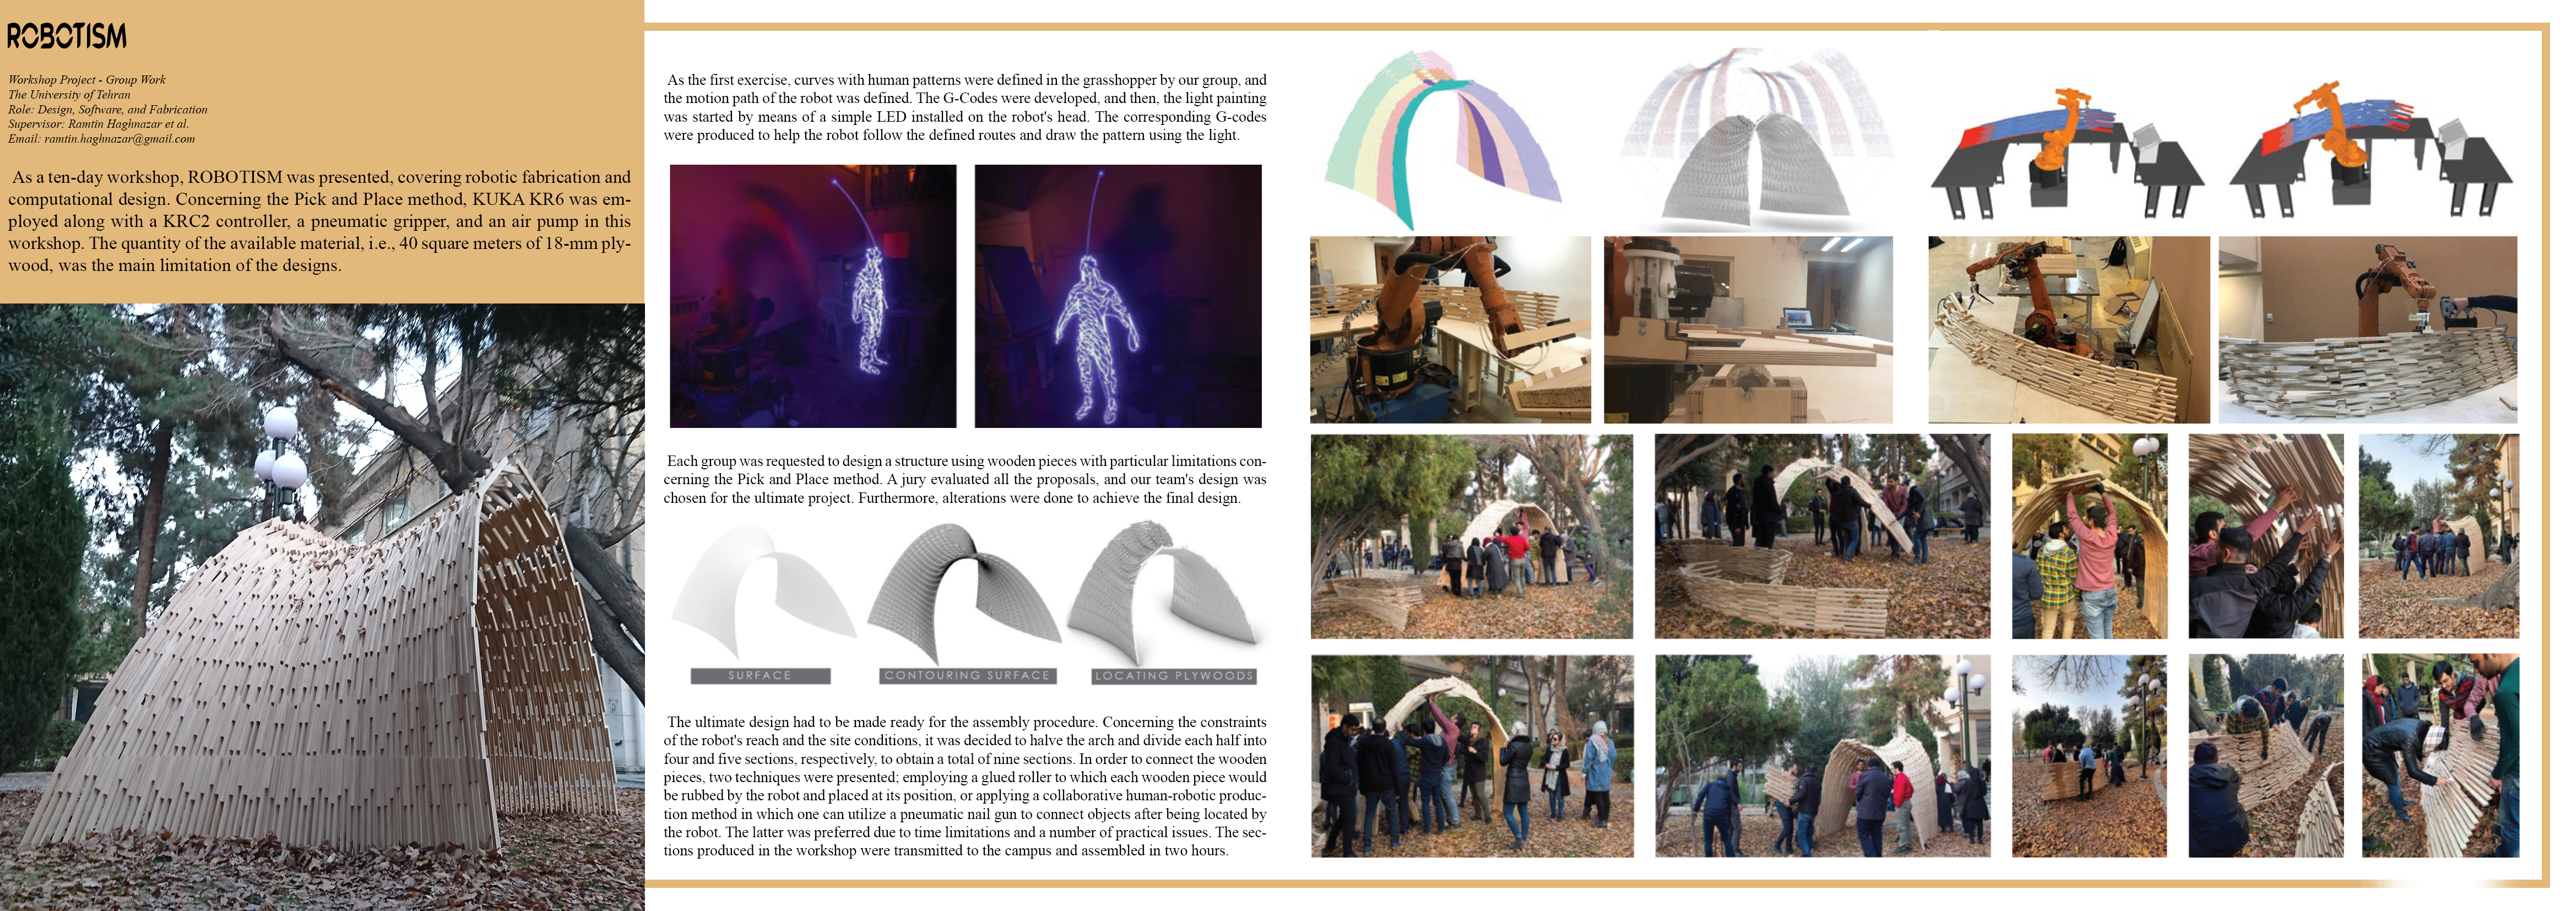
ROBOTISM is a 10-day workshop project in robotic fabrication and computational design. Working in teams, we learned the fundamentals of robot programming and toolpath thinking, then applied them in two tracks: (1) light painting using robot-generated motion paths, and (2) pick-and-place fabrication using a KUKA KR6 equipped with a pneumatic gripper. The final outcome was a full-scale plywood pavilion assembled from robot-placed components and completed with a collaborative human–robot fastening workflow.
KUKA KR6 KRC2 + KRL Rhino + Grasshopper G-code Pick & Place 18mm plywood
Workshop project • Group work • Robotic fabrication + computational design
The workshop began with an introduction to KRL syntax and the fundamentals of generating machine-readable motion instructions. After the initial training, we worked in small groups through a sequence of exercises aimed at building intuition for toolpaths, robot constraints, and fabrication-ready geometry.
We practiced defining continuous motion paths and understanding how speed, continuity, and reach constraints shape what is fabricable.
Curves were authored in Rhino/Grasshopper, then translated into robot-readable instructions (G-code/KRL workflow depending on the exercise).
Each digital path/sequence was validated in the real workspace—checking collisions, grip reliability, and whether the assembly remains stable during placement.
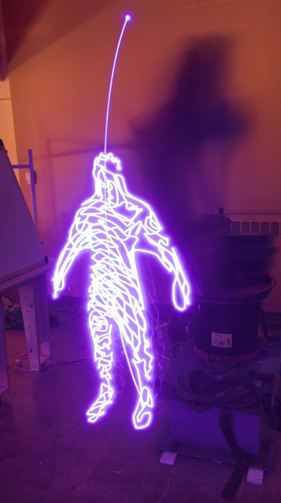
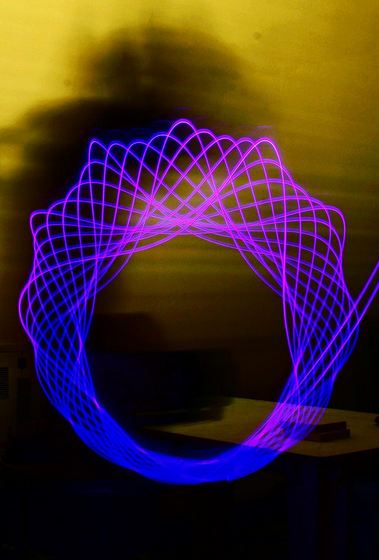
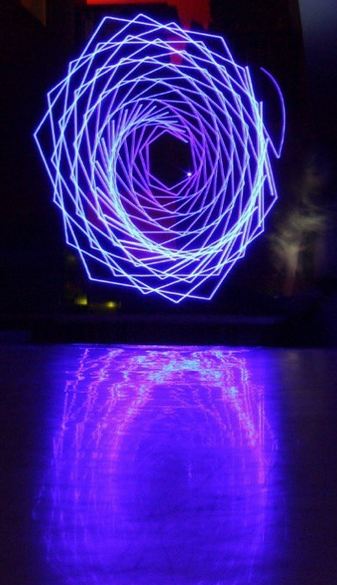
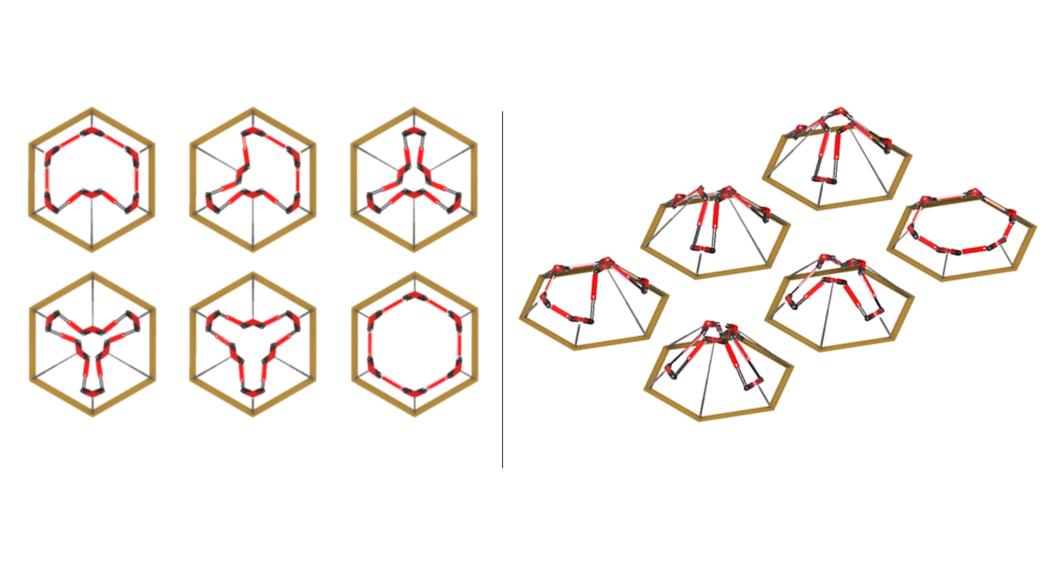
For the first exercise, we defined continuous curve patterns in Grasshopper 3D and used them to generate a robot motion path. After producing the corresponding instructions, we mounted a simple LED on the robot head and captured long-exposure photographs while the robot traced the curves in space.
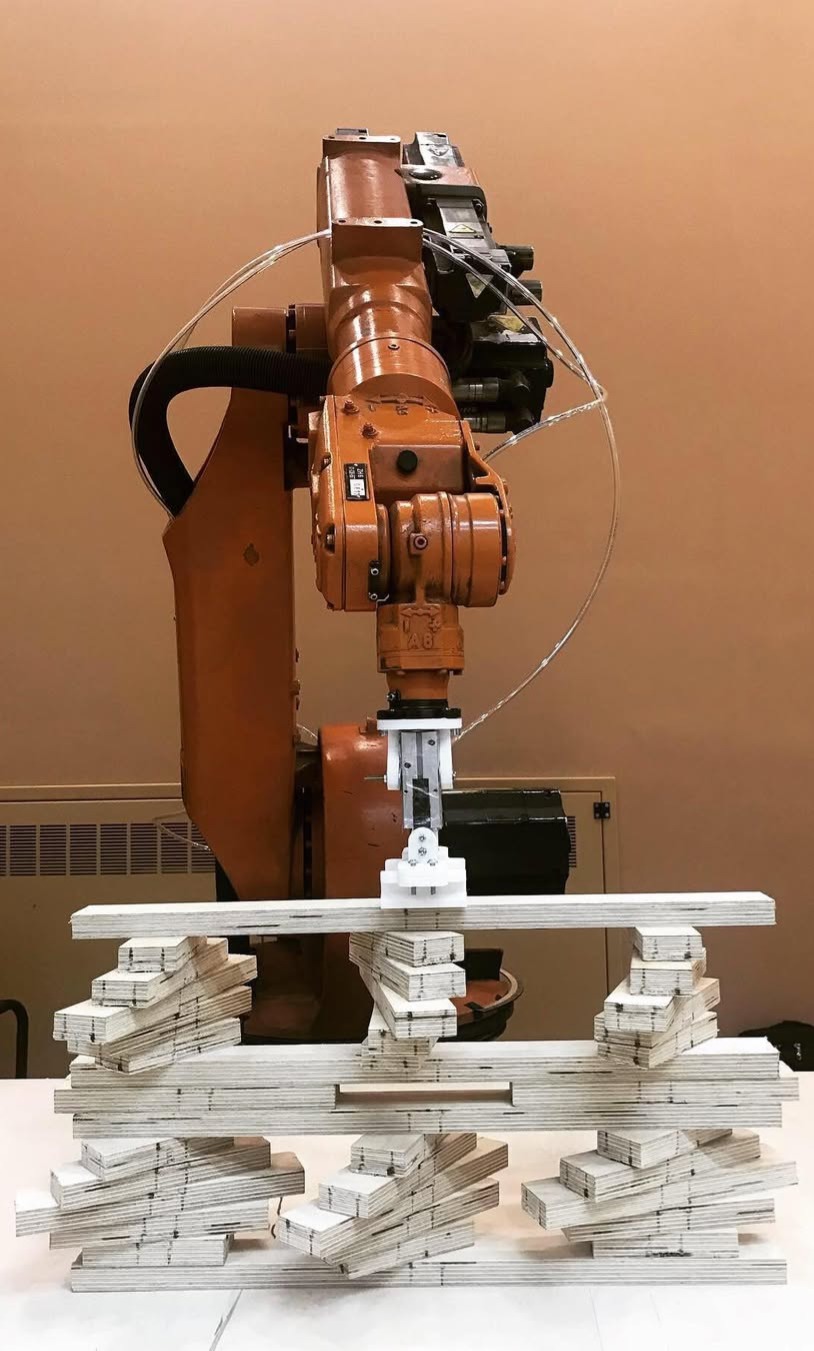
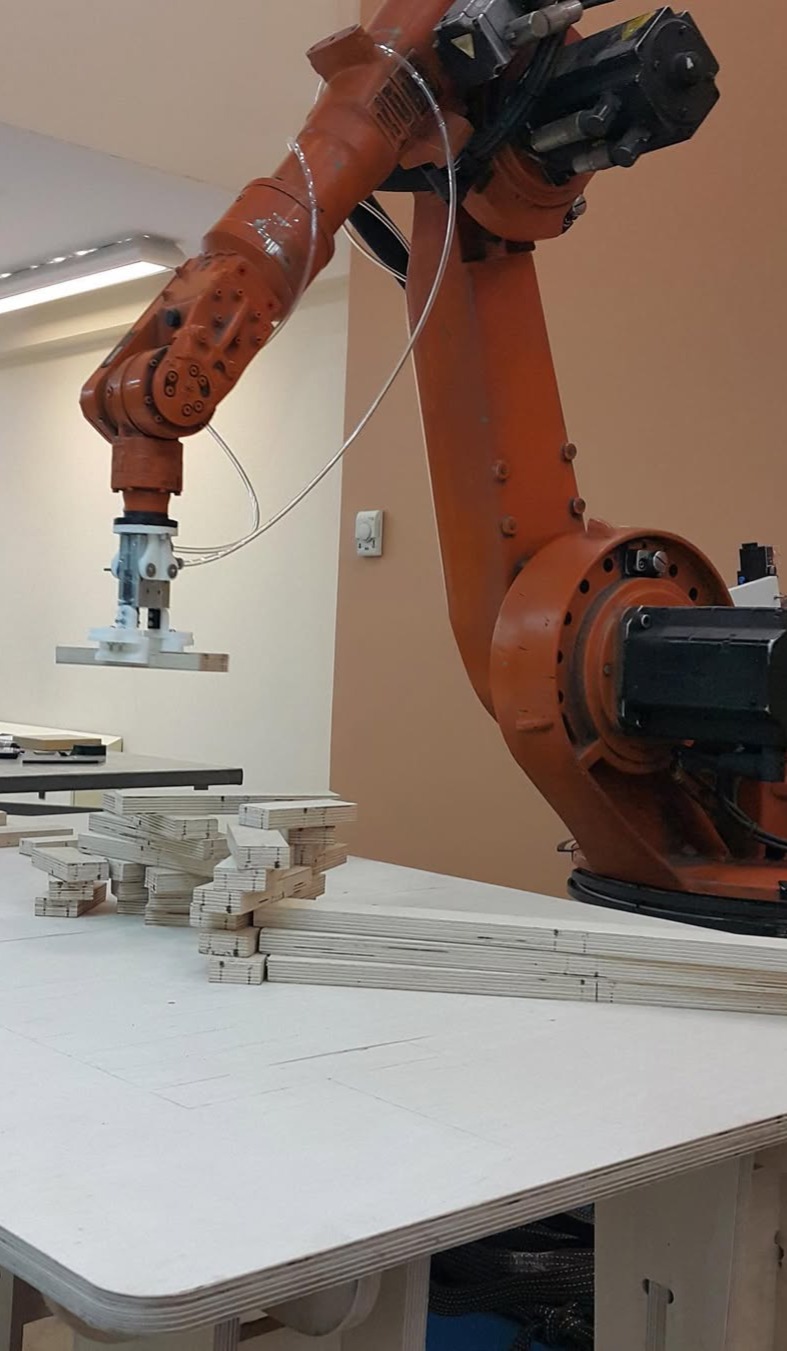
In the next exercise, each group designed a structure using wooden pieces with fixed dimensions and counts. The objective was to assemble the structure via pick-and-place while ensuring stability throughout the sequence—prioritizing an assembly logic that could stand without relying on screws or glue during placement.
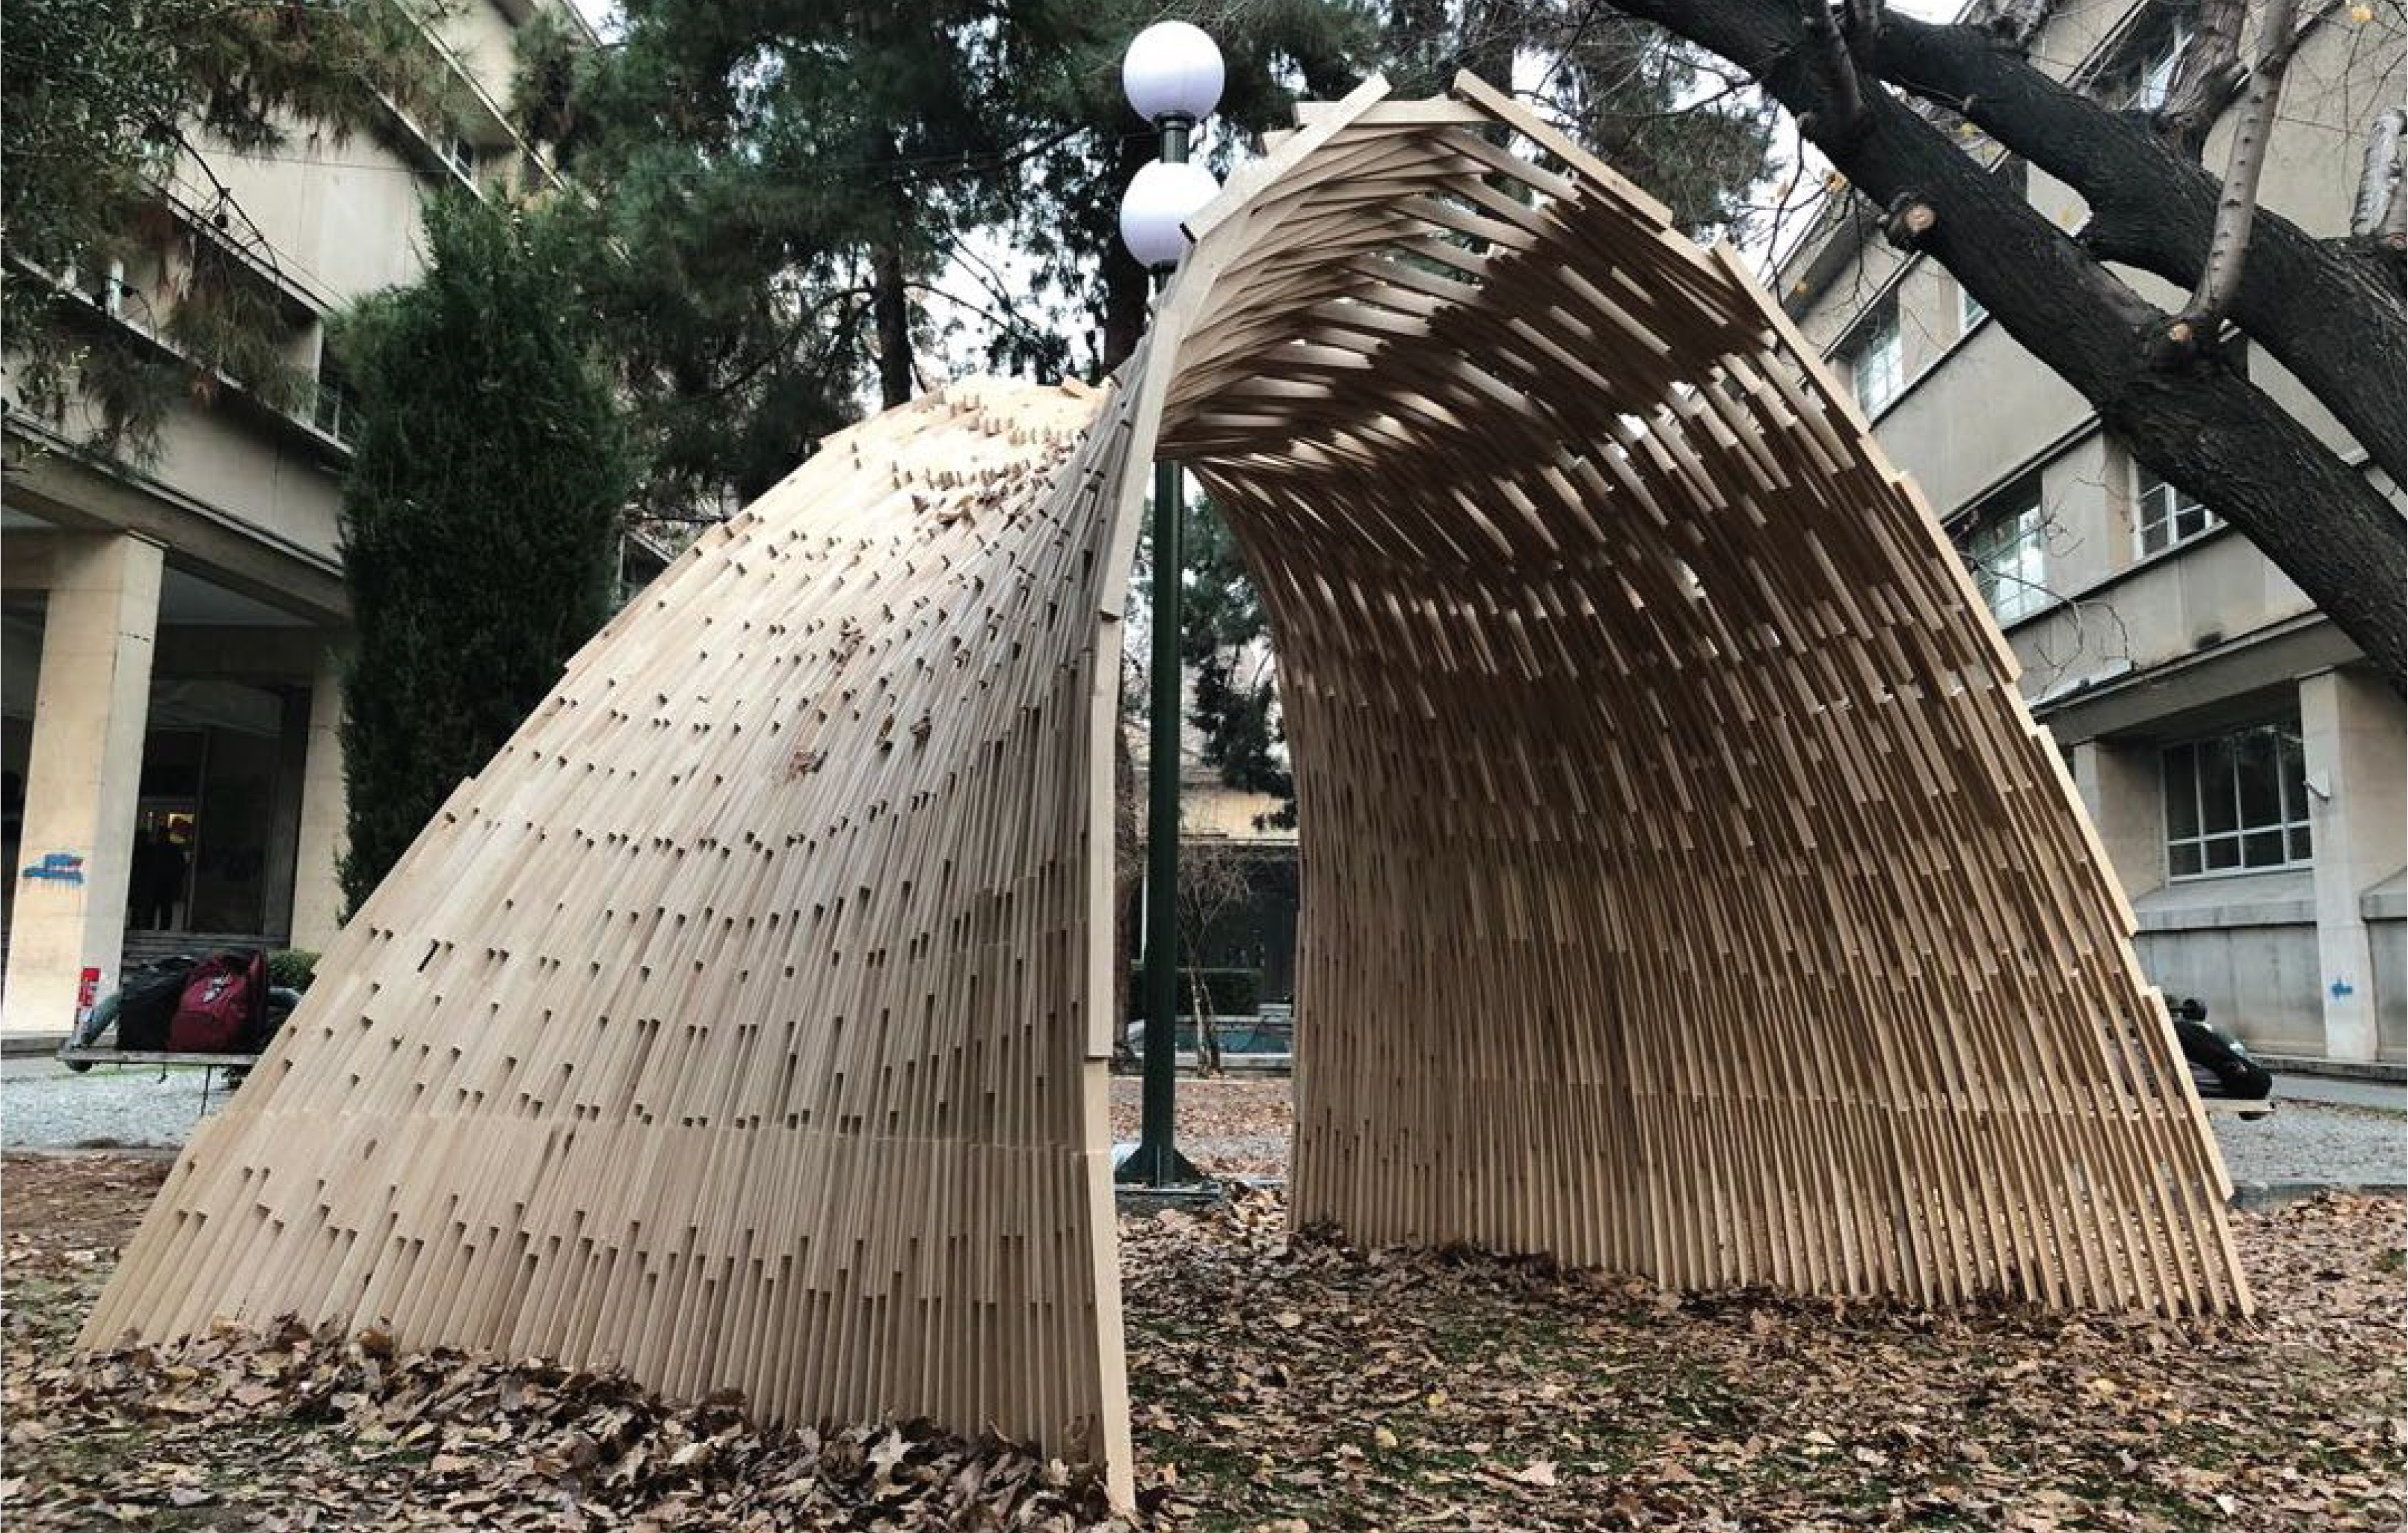
After the introductory tasks, teams proposed pavilion concepts at the scale of 1:1. Given the available material (~40 m² of 18mm plywood), designs were reviewed by a jury and one concept was selected for fabrication. The final design was refined and prepared for robotic assembly.
Because the robot reach was limited (~1.6 m) and the build site introduced placement constraints, the arch was divided into transportable sections. The strategy was to halve the arch and split the halves into 4 and 5 parts (a total of 9 sections).

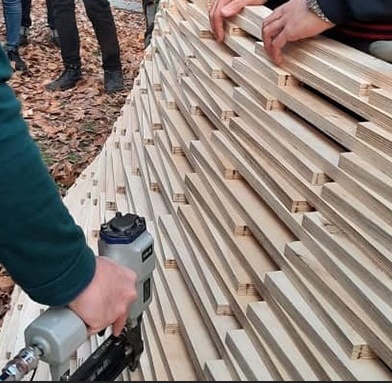
Two approaches were explored for connecting pieces during assembly: (1) a robotic gluing routine using a glued roller, or (2) a collaborative workflow where a person fastens parts after robot placement using a pneumatic nail gun. Due to time constraints and practical considerations, the collaborative method was selected for the final build.
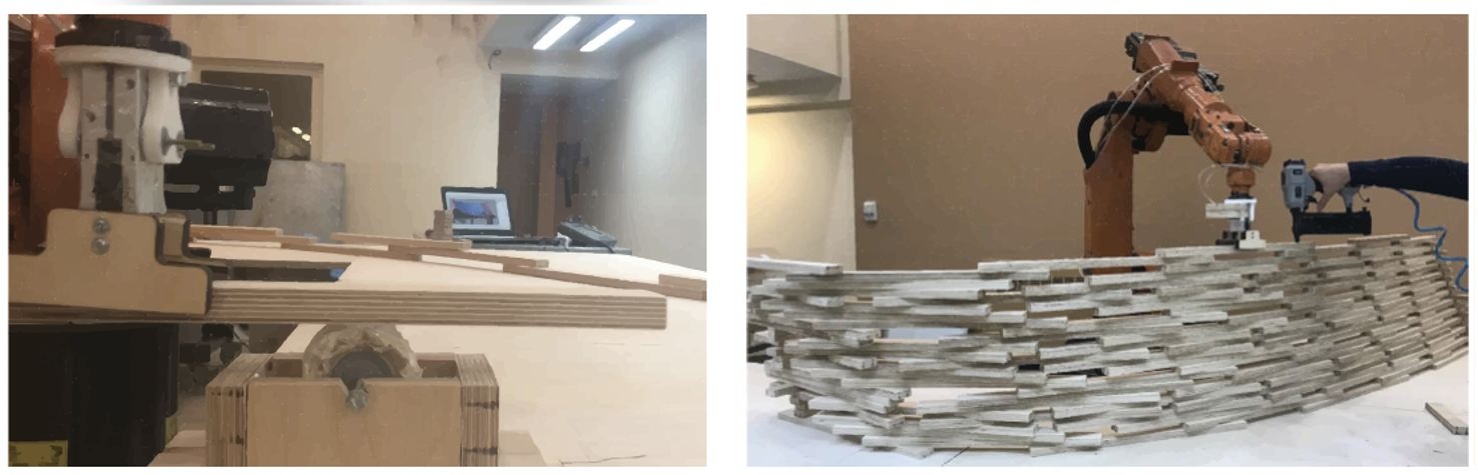
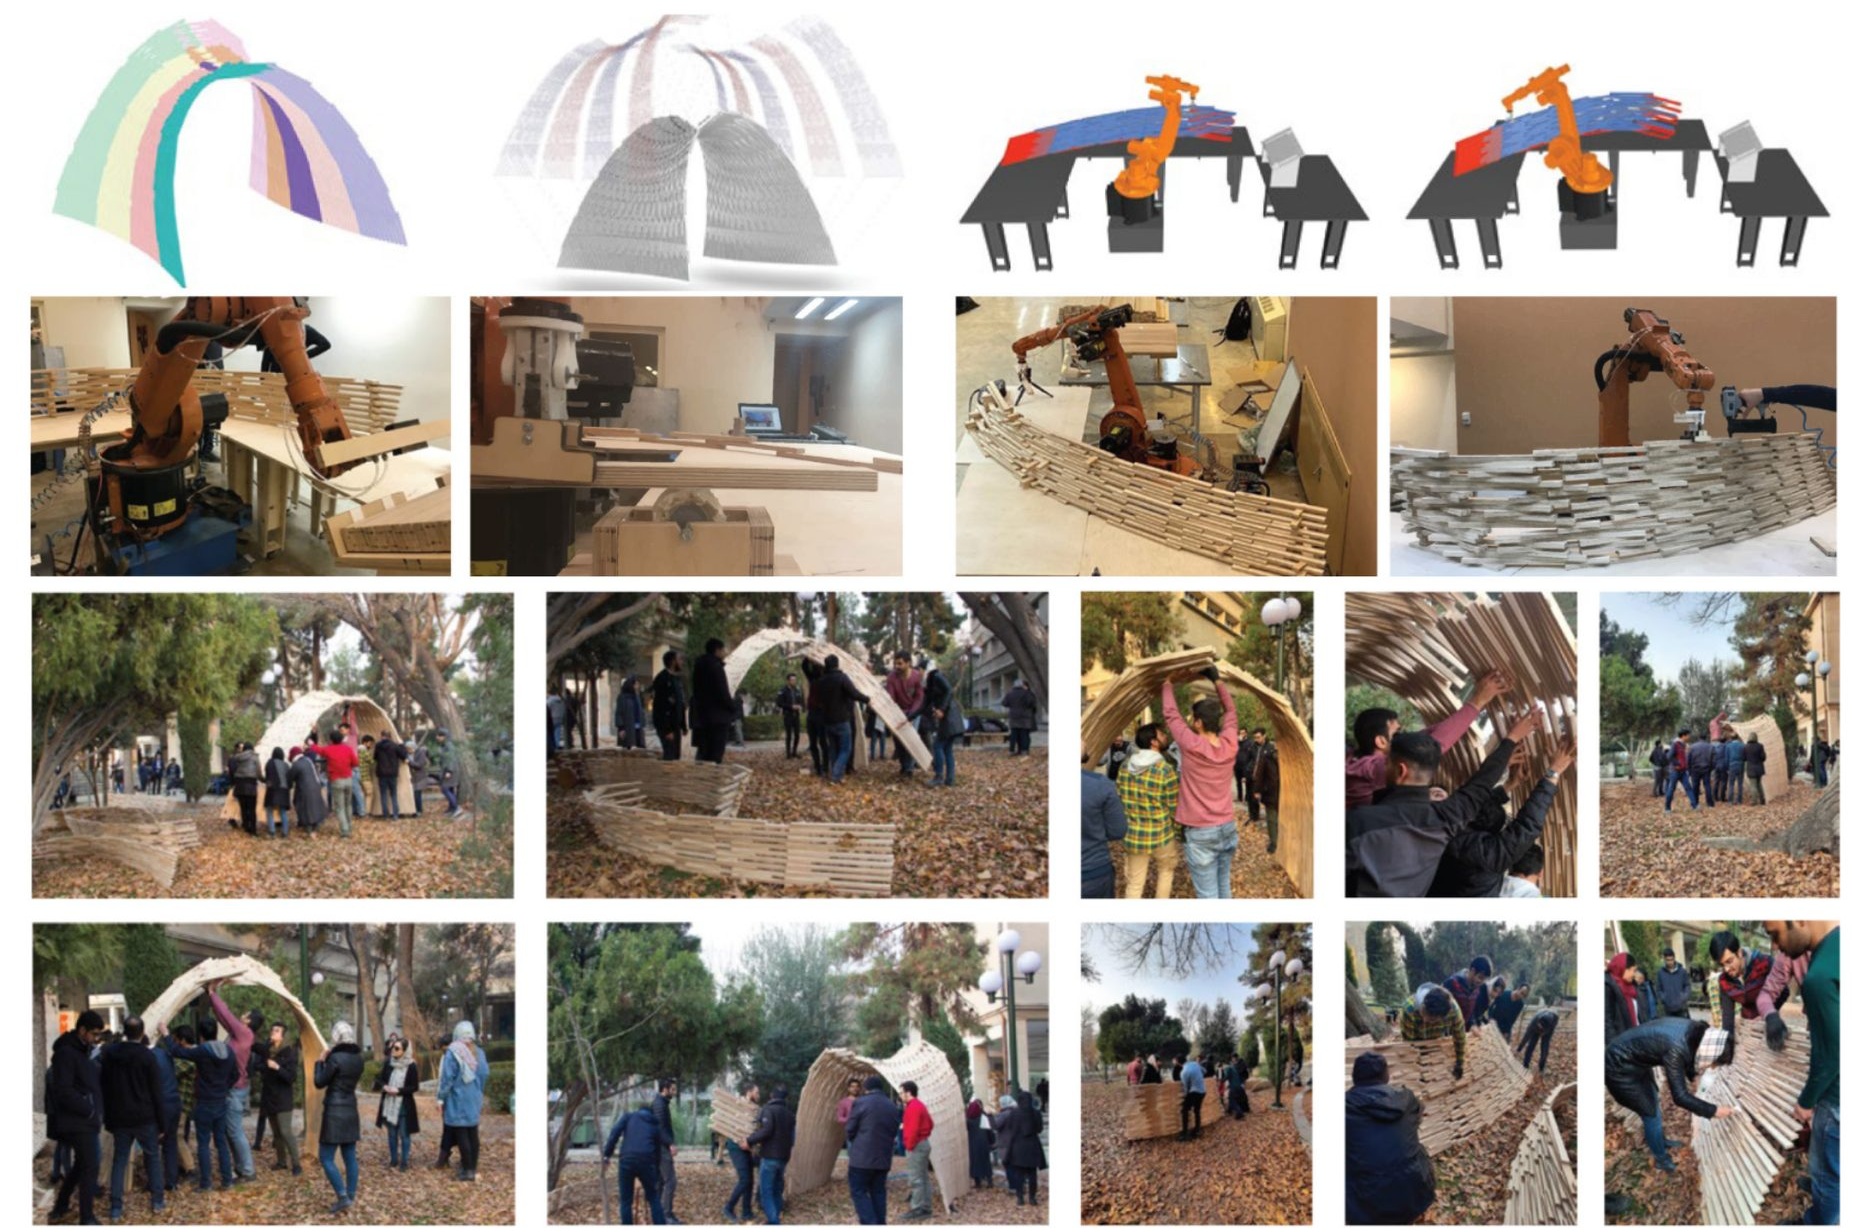
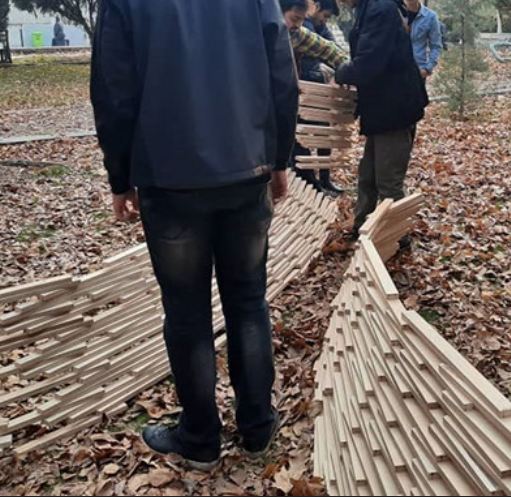
The fabricated sections were transported to campus and assembled on site. Installation was completed in approximately two hours, demonstrating how up-front planning (segmentation, sequencing, and connection strategy) can make large-scale fabrication workflows feasible within tight workshop timelines.

Parametric geometry becomes fabrication-ready only when translated into stable sequences, tolerances, and collision-aware robot motions.
Robot reach, end-effector behavior, and material limits directly shape form, segmentation, and assembly strategy.
Hybrid workflows (robot placement + human fastening) can be a practical solution for time-limited contexts such as workshops and rapid prototyping.
Academic project • Group work • University of Art • Role: conceptualization, fabrication
Summary
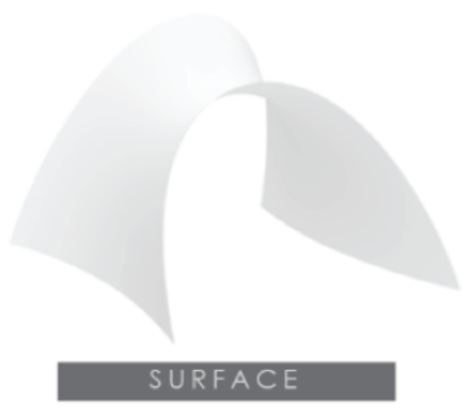
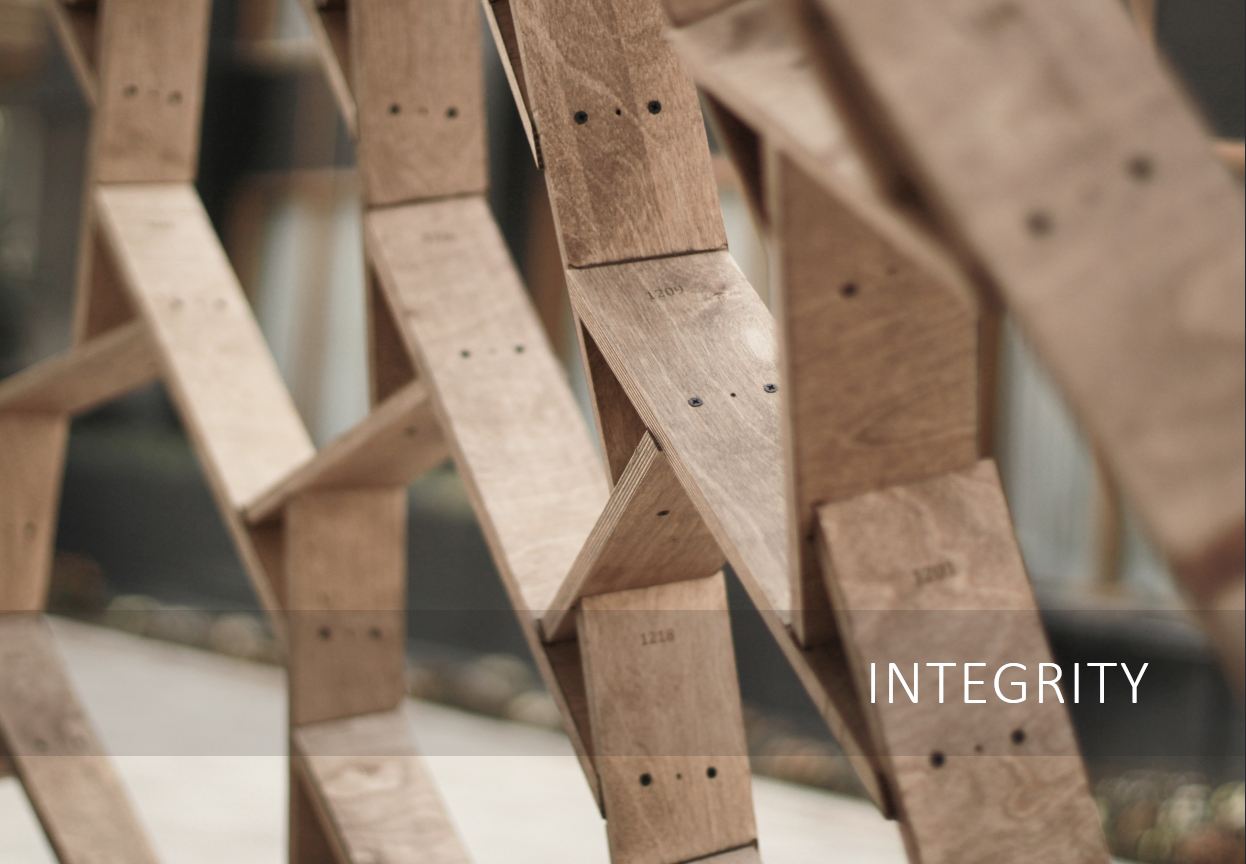
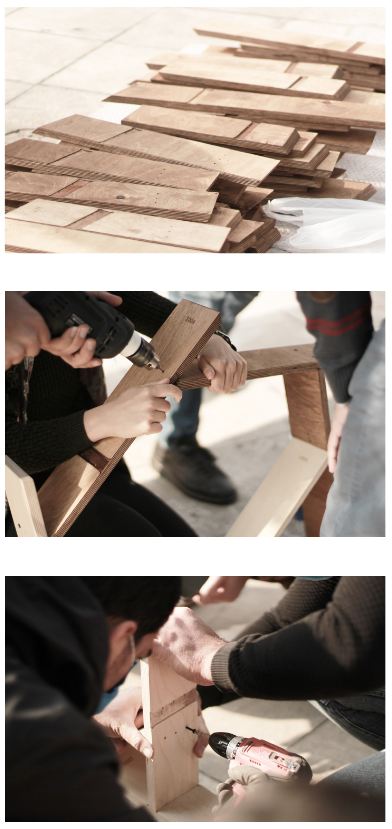
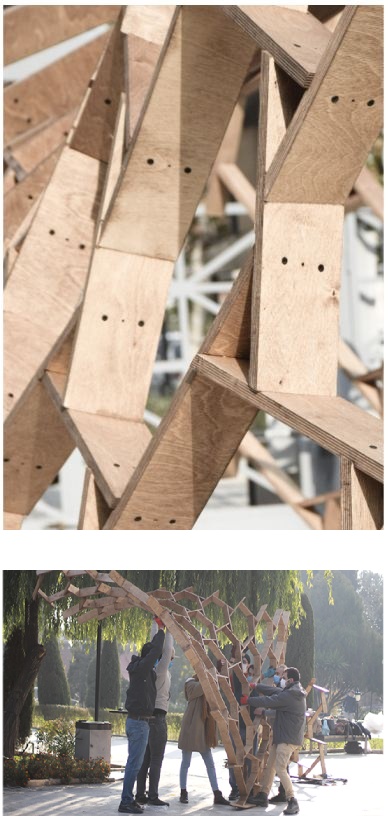
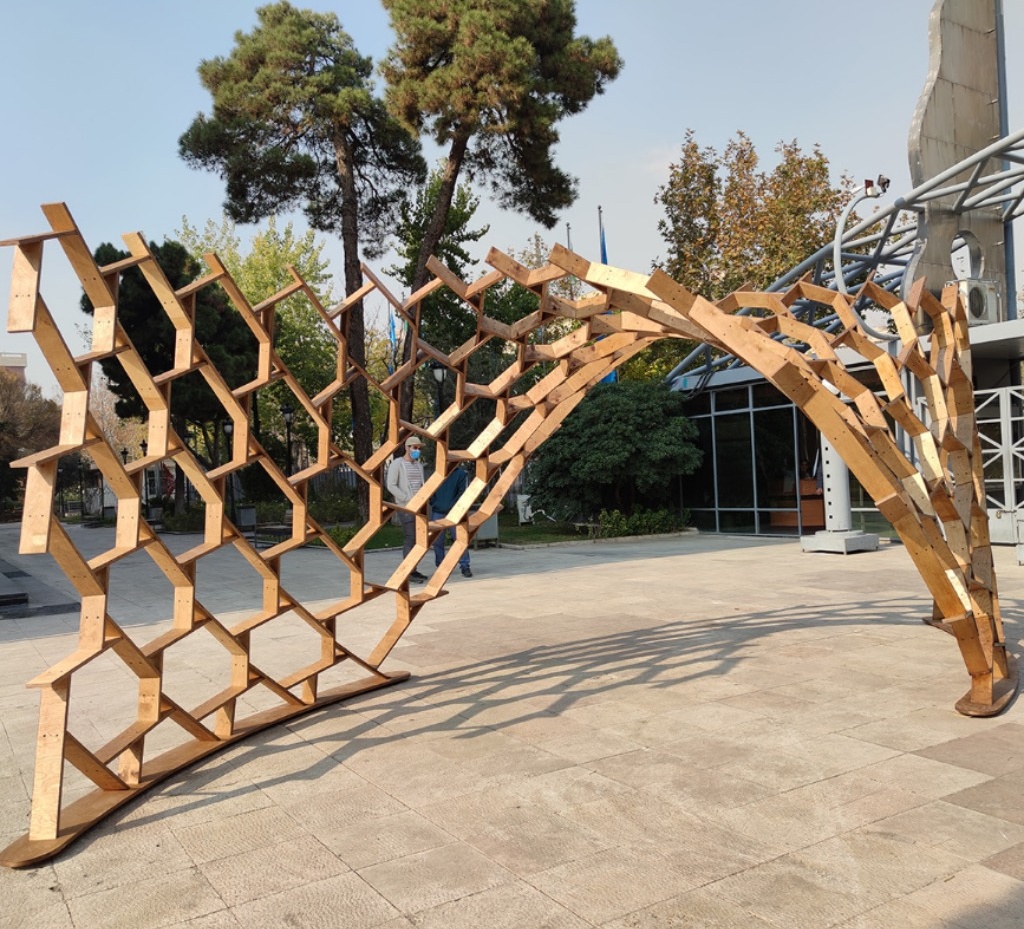
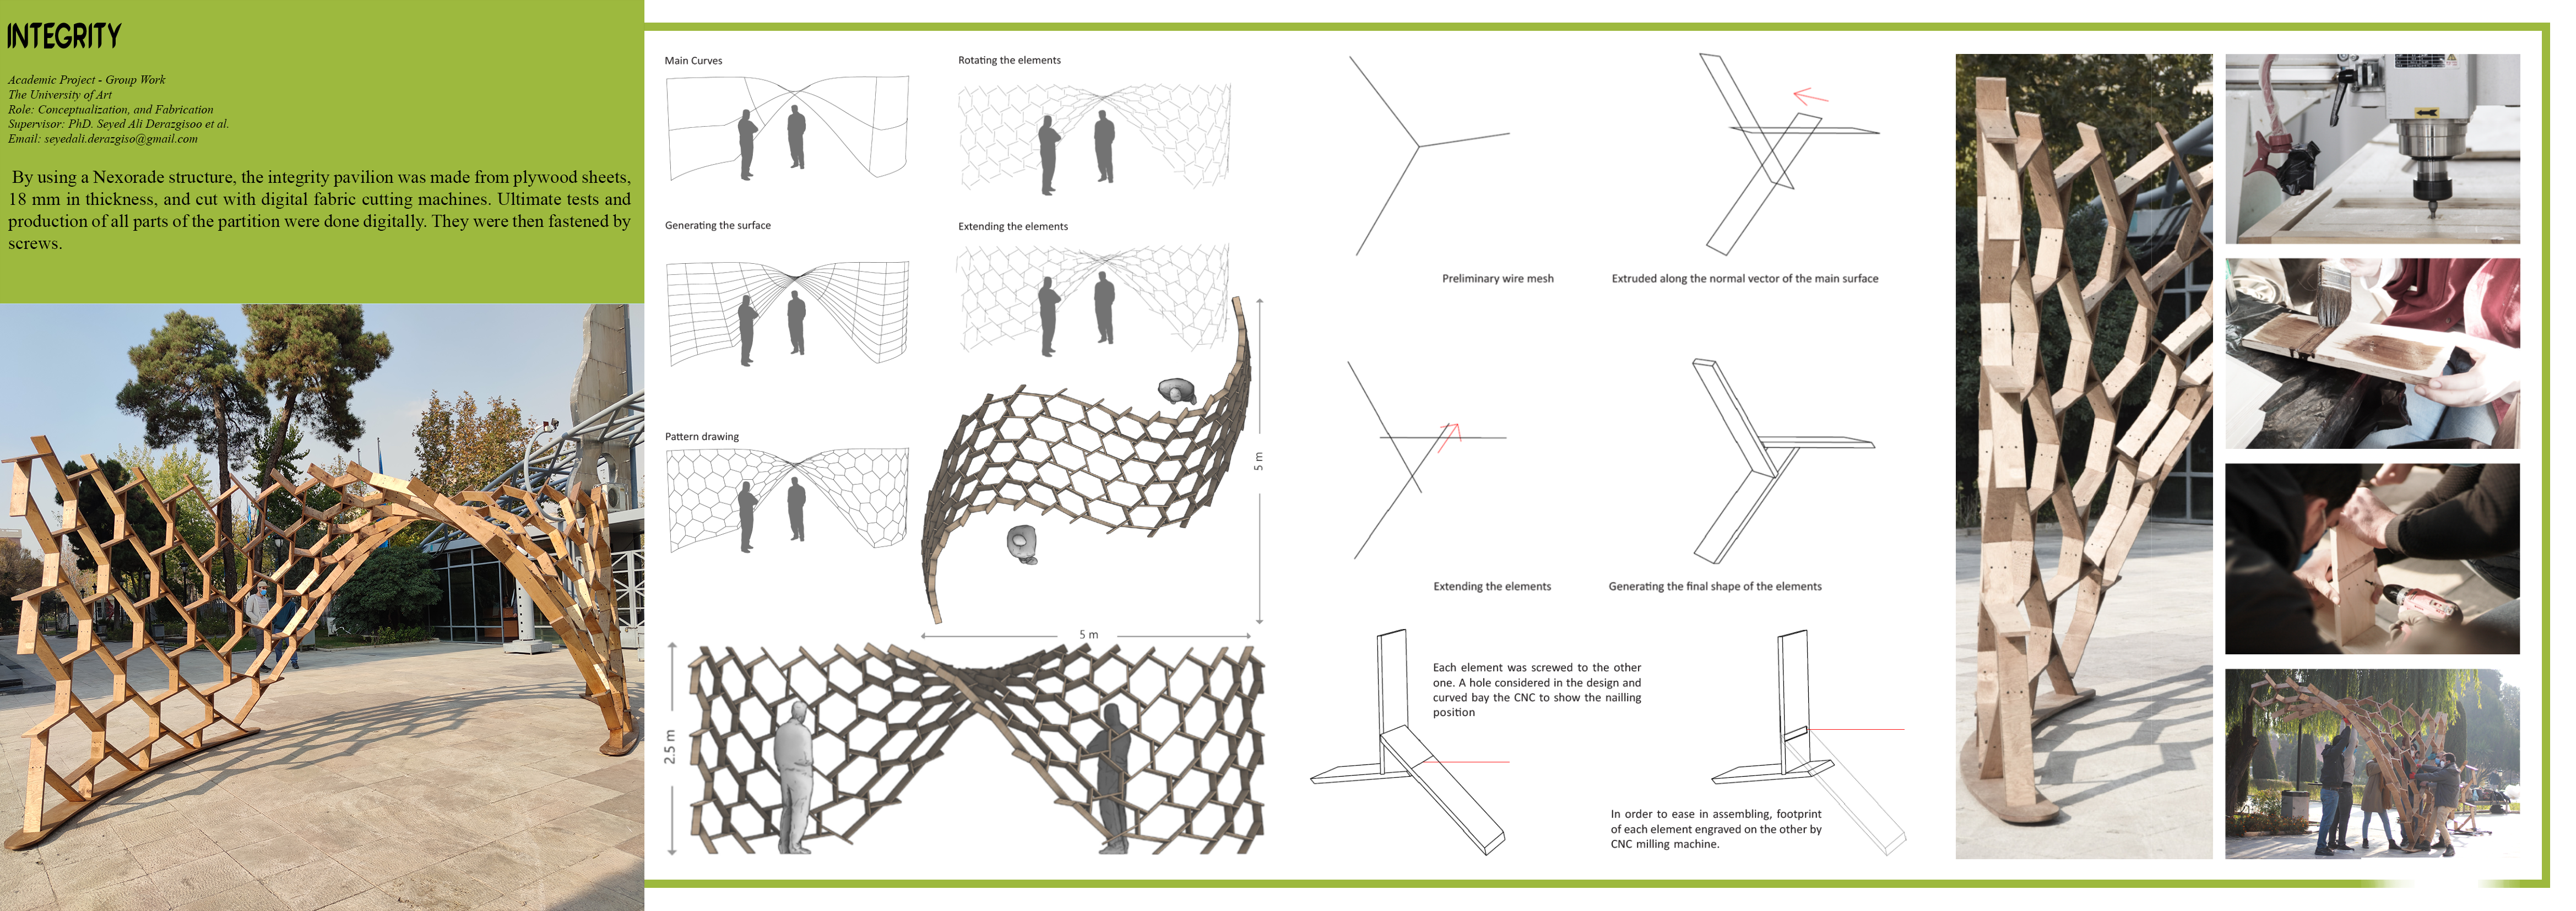
INTEGRITY is a full-scale plywood pavilion developed as a digital fabrication project using a Nexorade structural logic. The project was designed and tested digitally, produced from 18 mm plywood sheets using CNC cutting, and assembled on site using screwed connections (no adhesives).
Nexorade structure 18mm plywood CNC cutting Screw assembly Full-scale installation
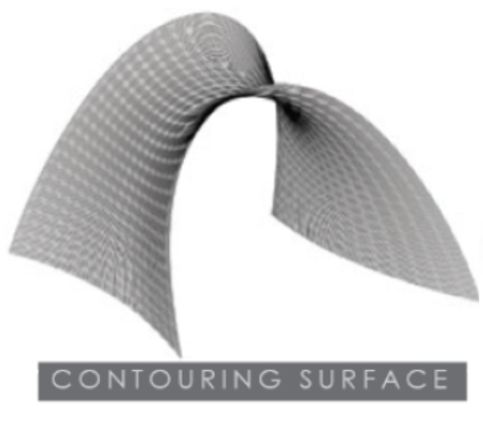
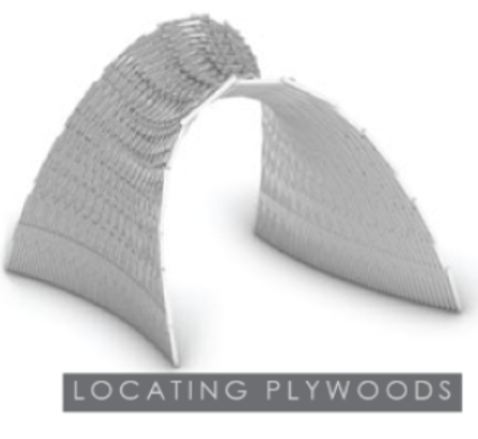
The digital pipeline starts with defining main curves and a guiding surface, then generating a lattice pattern that is adjusted by rotating and extending elements to achieve structural continuity. Element geometry and connection details are finalized to support straightforward assembly and accurate positioning during fabrication.

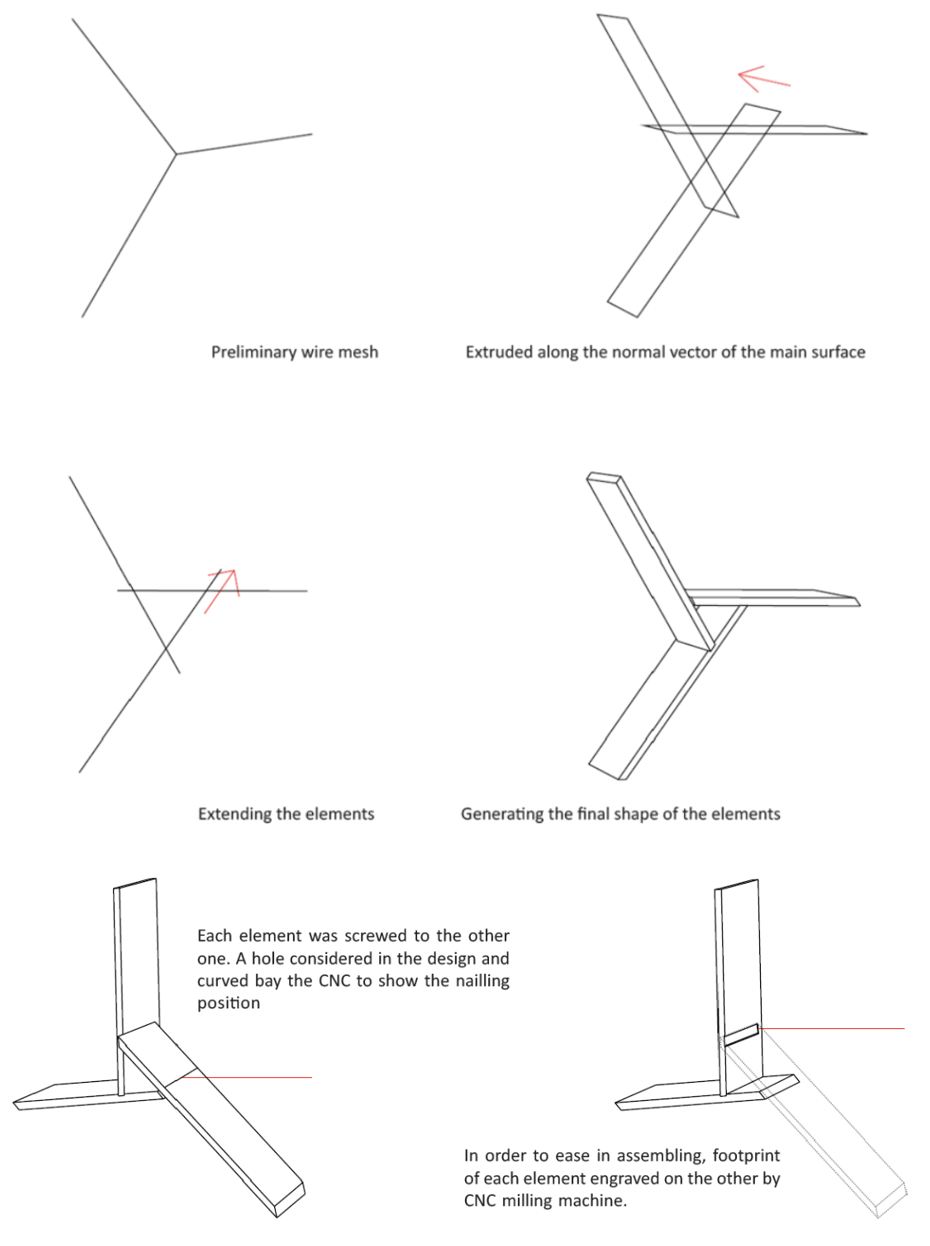
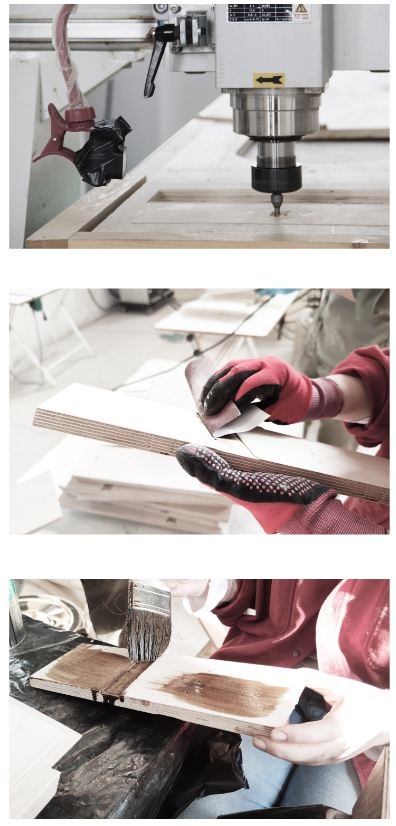
After digital testing and finalization, elements were produced and labeled for assembly. CNC milling supported accurate cuts and alignment features, while the on-site build relied on screw fastening and coordinated lifting/positioning to form the final pavilion geometry.
Academic project
Summary
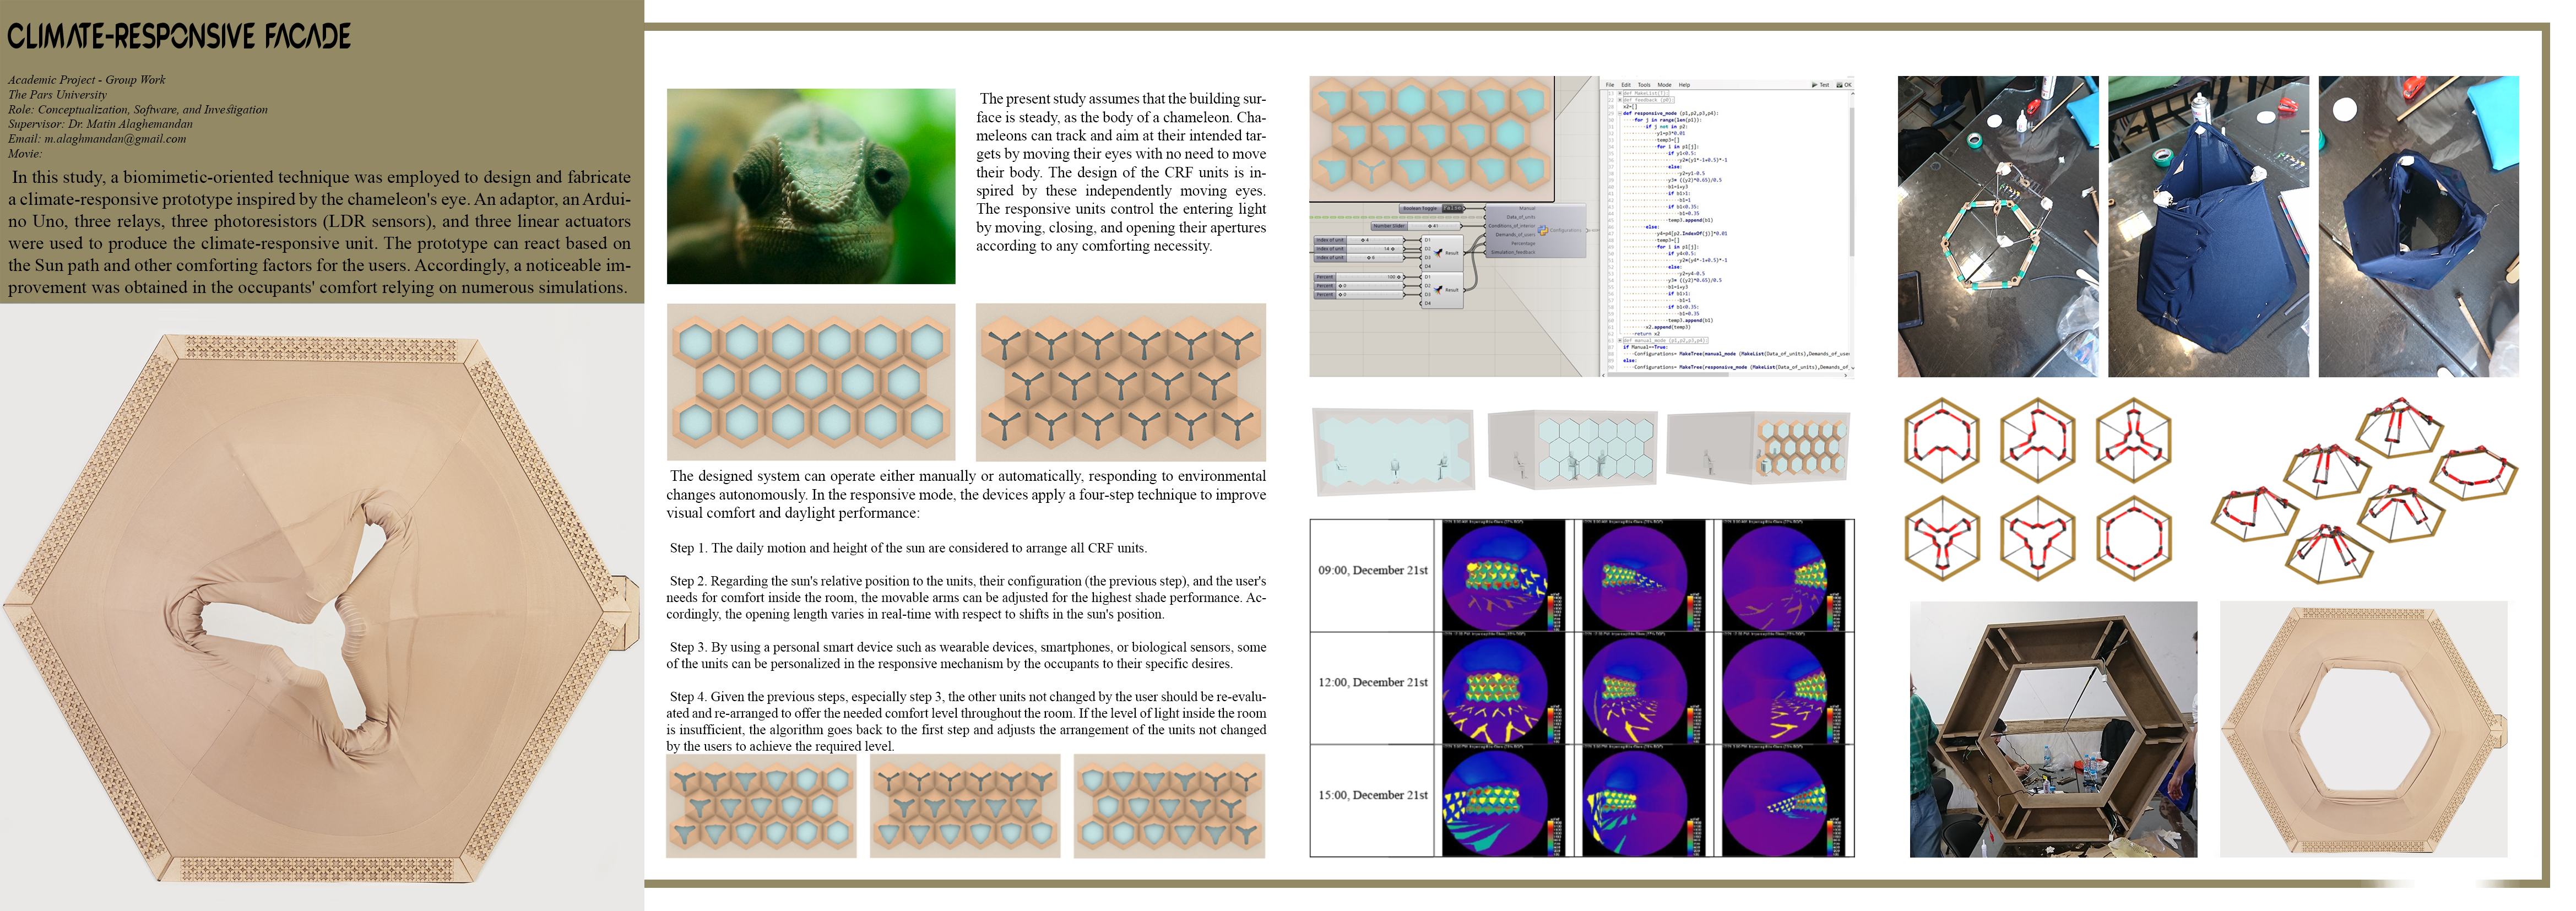
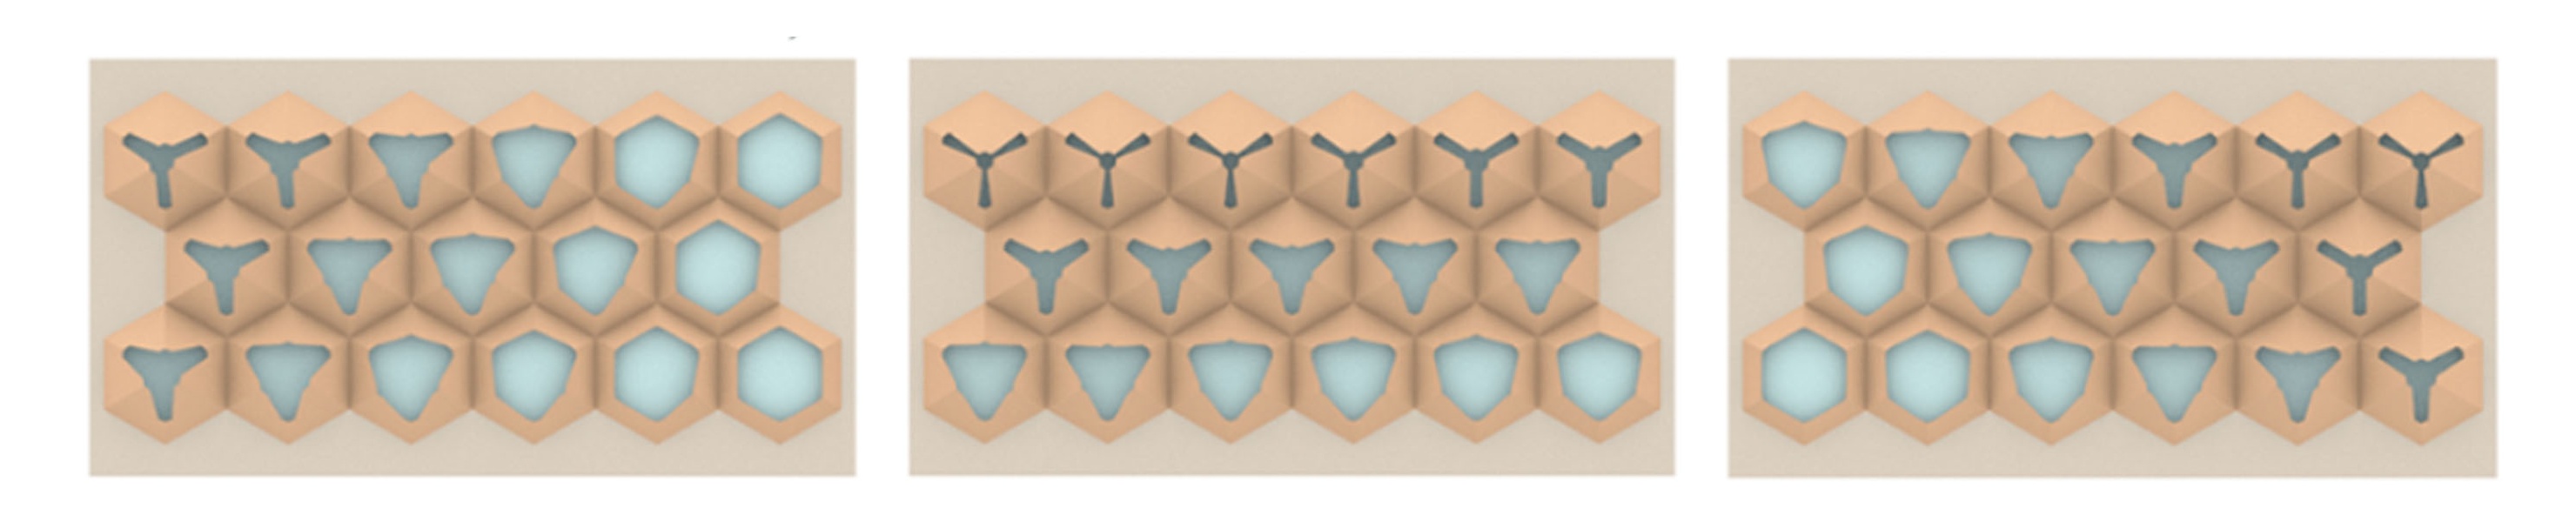
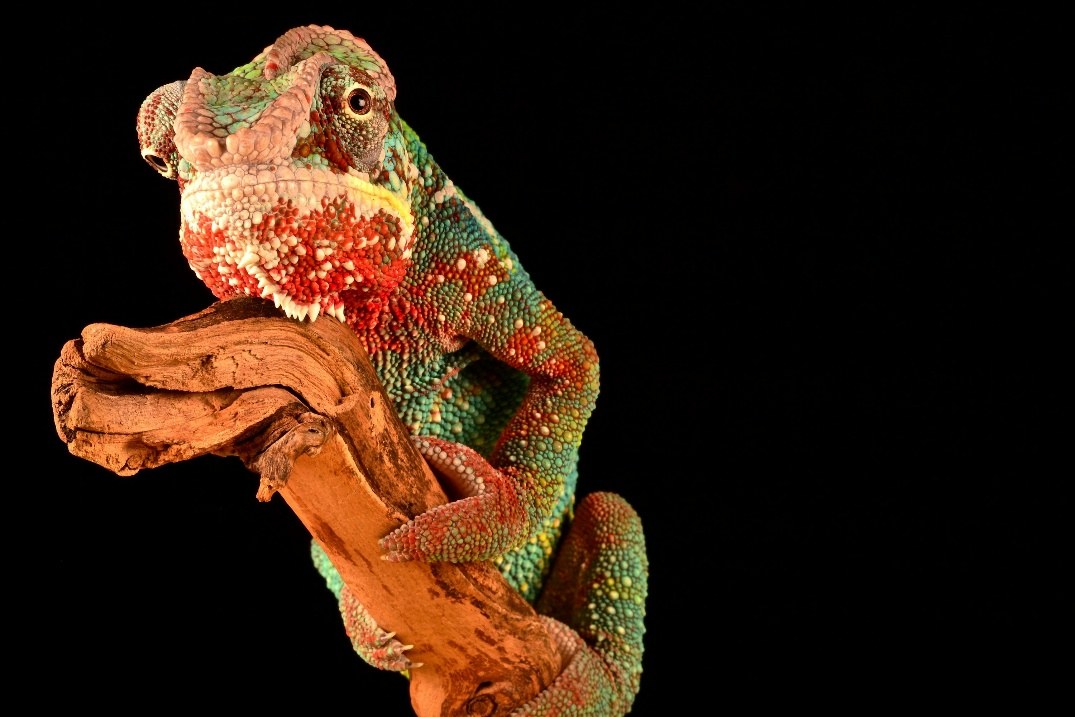
Climate‑Responsive Façade (CRF) is a biomimetic, textile-based kinetic envelope prototype designed to improve visual comfort (daylight quality + glare control) in hot and arid climates. Inspired by how chameleons move their eyes independently, each façade module can adjust its aperture and orientation in real time, enabling localized shading responses for different zones behind the same façade.
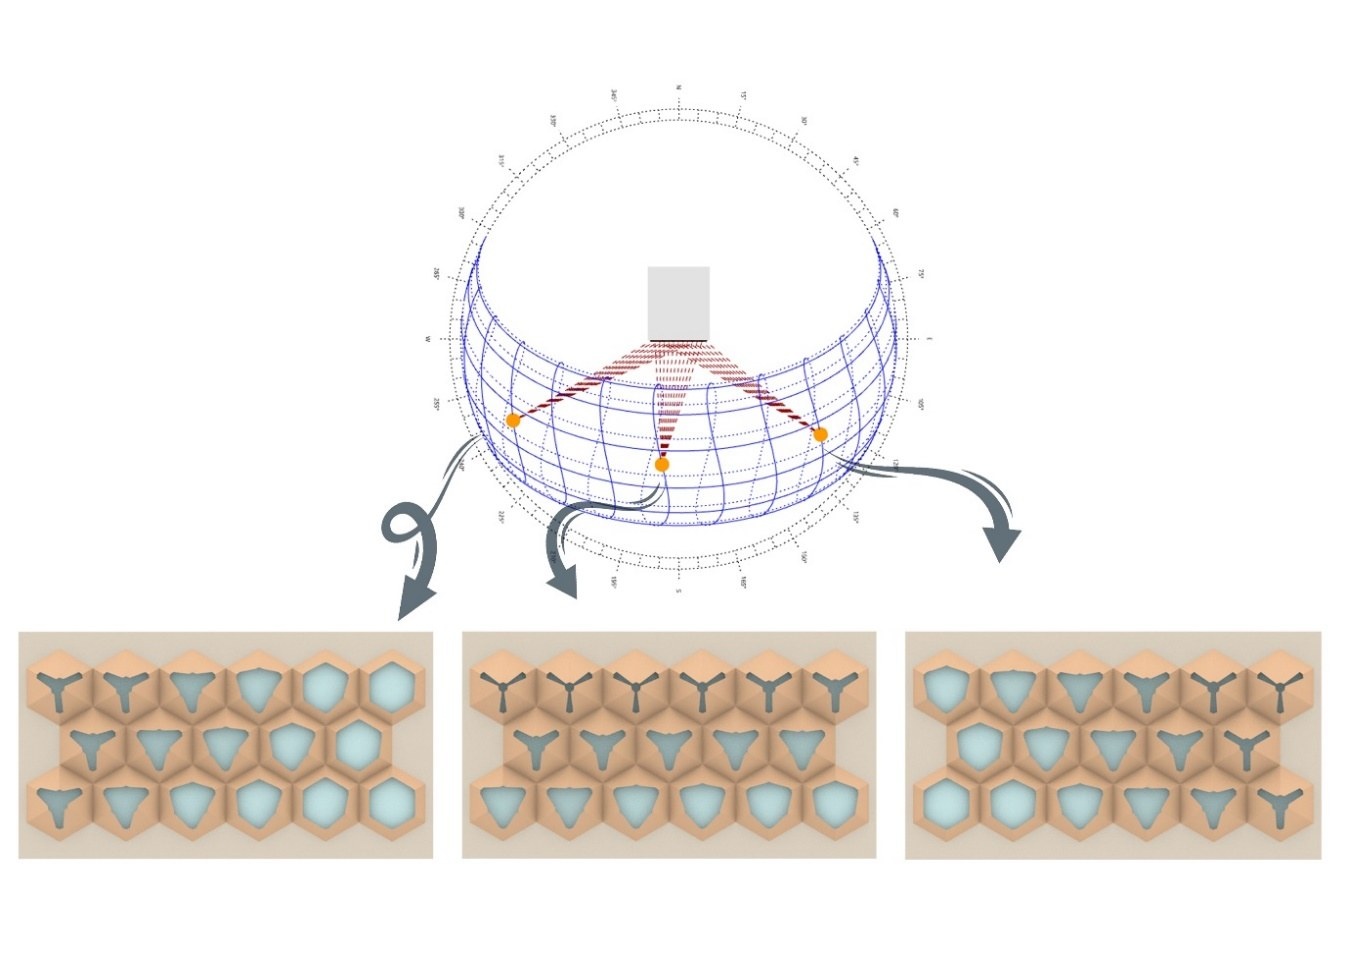
The workflow connects parametric design (Rhino/Grasshopper + Python) to daylighting simulations (ClimateStudio/Radiance), then validates the system through a physical prototype actuated by linear actuators and controlled via an Arduino with LDR light sensors. The result is a façade concept that offers granular control over daylight penetration while preserving openness and reducing discomfort glare.
Biomimicry Kinetic facade Rhino + Grasshopper ClimateStudio / Radiance Arduino + LDR Linear actuators Fabric prototyping
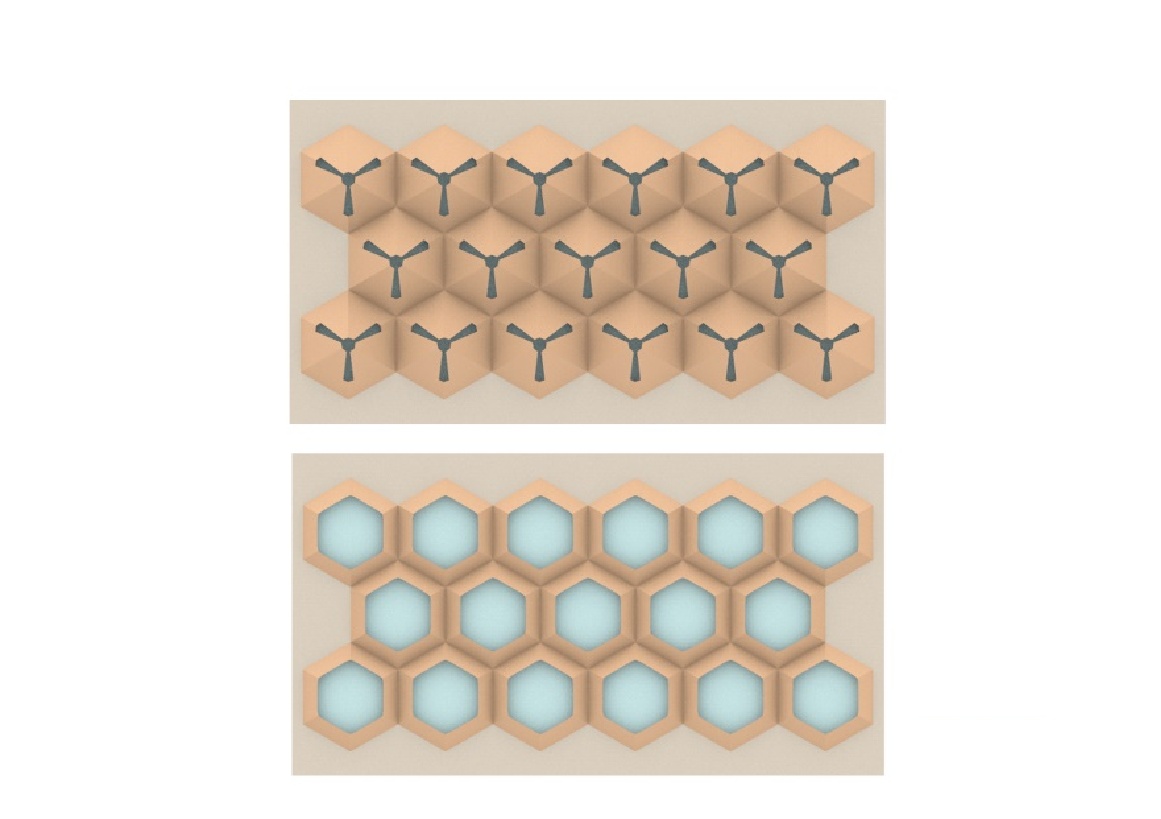
The prototype validates real-time adaptability using a lightweight structure and a stretch-fabric skin. Three linear actuators drive the movable arms of each unit; LDR sensors read local light levels and feed the controller; and an Arduino UNO coordinates actuation through relays. The stretch textile accommodates multi-direction motion while maintaining continuous surface tension.

If it doesn’t load, use the direct link below.
Bridges biomimetic concept design, parametric control logic, simulation evaluation, and physical prototyping in one pipeline.
Independent modules allow localized shading responses—supporting comfort without forcing a single global “open/closed” facade state.
Stretch textiles enable richer motion and lighter mechanisms compared to rigid-panel systems—well-suited for responsive envelope research.